Transportation is not the sole task that we ask from our bikes. We also demand beauty from them, which is possible by combining several colors, designs, patterns, and so on.
So, we often think about how to paint our bikes on our own, according to our taste? But when the issue of removing the parts becomes daunting, then we don’t refrain from the thoughts of how to paint a bike without taking it apart?
When it comes to painting a bike without taking it apart, the first and foremost aspect is to ensure the pre-preparation before painting it.
That is to say, cleaning, removing rusts, using chemical removers, vinegar, etc. Also, covering the bike parts that you don’t want to paint is necessary. Using the right painting equipment also plays a vital role in accomplishing the following task.

How To Paint A Bike Without Taking It Apart? (9 Quick Step)
There is no need of mentioning anything extra other than the below-mentioned steps of painting your bike without taking it apart, which are:
1. Removing Rusts:
Everyone knows that rust prevents the paint from sitting on the surfaces evenly. So, before doing anything else, the first thing people come up with while painting anything is removing the rust.
There are several different ways to remove rusts from your bike’s frame as well. One of the very cost-effective ways is to rub an aluminum foil soaked with cheap ingredients like coke. Also, other money-saving techniques are to use home ingredients like vinegar.
If anyone wants a readymade and high-end rust removing technique, they can go for the chemical rust removers.
2. Removing labels and stickers:
Before starting to paint, make sure to remove all those items which won’t allow the actual frame of your bike from getting painted. That includes the labels and stickers.
But, removing them becomes difficult many times, for which you can use a heat gun or hair dryer to loosen the adhesive and remove them quickly. Instead of using your hands or fingers, use a spatula for the best of results.
3. Sanding the frames:
Sanding makes the paint stick better onto your bike’s frame. So, although it is a matter of time to do the sanding, never skip it to get the best results.
You have to use sandpaper for sanding the frames using your own hands.
Clean your frame before the sanding and thorough sanding, roughen up the body to become long-lasting, practical, and thought to the paints.
4. Cleaning the bike properly:
To get the best output from the paint, you must ensure that your bike is in the best state before the painting. And, to have so, make sure to clean it by wiping it with a wet piece of clean cloth mixed with soap water.
Also, allow it to dry before going to the next steps.
5. Covering of the unwanted parts:
Some of the specific details of your bike should be free from paints, such as the bearings, bike sea, break posts, headsets, and so on. Instead, cover them using foil papers, tapes, newspapers, and trash papers.
6. Hang or mount the bike for painting:
Mount your bike using a rope to the sealing for the ease of the painting purpose. It will allow saving spaces and help you reach every portion of your bikes with ease for the painting.
Also, you can lay newspapers underneath your mounted bike to prevent your space from painting droplets.
7. Applying primer before paint:
A primer gives your bike’s frame a protective layer to sustain the colors even in the worst environmental factors. In addition, it allows the paint to stick most efficiently, thus providing you with the best output. So, before starting with the first coat of paint, make sure to apply the primer.
8. Painting the bike:
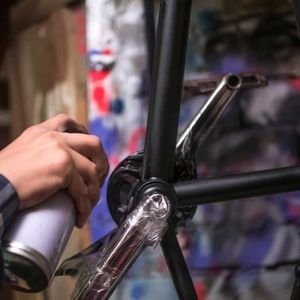
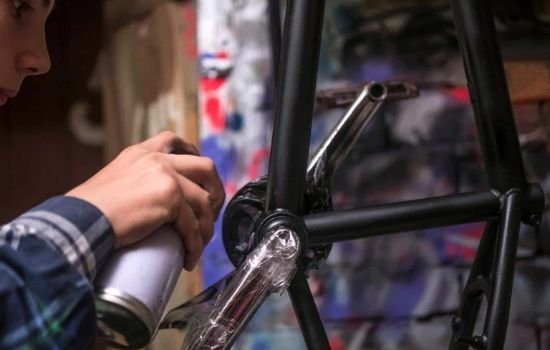
Finally, start with painting the bike. Before doing so, you need to make sure that you have chosen the right sort of paint, which is spray paint, as generic color results in variable output and undesirable effects.
Do not combine multiple spray paints as they may react with each other adversely. Also, in case of a matte finish result other than the glossy looks, choose flat spray paint for the purpose.
9. Application of a clear coat:
Before applying the apparent clot, which is necessary for making the paint weather and scratchproof, enable the second coat of paint to dry. Then finally, go for the clear coat and allow it to dry for 24 hours.
If you are a more visual learner, here is a video link about How To Repaint MTB Frame Using Spray Cans Without Removing Old Paint on YouTube.
Can you spray paint a bike without taking it apart?
When it comes ultimately to painting your bike without removing its parts, the first thing that comes to people’s minds is spray paint.

A spray paint indeed is made to do such tasks as it can reach most out of the parts that a regular color can’t do. That is to say, you don’t need to remove the details of your bike to make your spray paint reach most parts.
Spray paint also allows your bike to paint it conveniently, quickly, and at a way faster rate. There are endless benefits of spray paint, and its usage is also mostly limited within vehicles. But, again, they are so much less in terms of the wastefulness of the colors.
Touse spray paint most efficiently, spray each of the coats evenly with your steady hand before going to another coat, and you don’t need to take any of the bike parts apart.
Can you paint your bike using a brush without taking it apart?
Yes, but spray paint is mostly suggested over a brush painting method for several reasons. Of course, that doesn’t mean that you can’t use brush paint to paint your bike. But, in that case, it is best to take some of the parts of your bike apart.
With that said, spray paint allows the application of thin and even coats more rapidly than brush colors. Again, any portions of the bikes exist, which are hard to reach by the brush paints compared to spray paints.
Again, every coat of brush paints can even take up to a week to cure, whereas spray paints are way much faster in curing.
How many coatings of paint does the bike need?
One of the most important parts of painting your bikes or any other vehicle is the number of coats required. If the skins’ number, quantity, and quality are not legit, the painting will not be up to a point.
With that being said, using a layer of 2-3 coats of paints is sufficient to get the best sort of finishing and quality from the paint. You are doing less or more than that would come to no good. It won’t be durable if you do too much color and would compromise the finishing.
Professional bike painting vs. DIY bike painting, which is better?
Both have individual advantages from their sides, but it depends on you the most. Your sense of perspective and individual needs will reflect the scenario of whether you prefer the painting of a bike by a professional or going for the DIY painting.
| Professional Painting of the bike | DIY Painting of the Bike |
|---|---|
| Professional painting allows a robust coating of the paints and advantage for those who want to save their time. | DIY painting costs more time of the individuals and also leaves chances for compromising with the coating quality. |
| Professional painting demands high costing and extra charges for additional customization. | DIY home paintings will save you from extra expenses. |
| Painting is limited to specific ranges of colors and patterns. | There is every chance of representing your creativity through painting your bike by own. |
With that being said, the general view of differences between professional bike painting and DIY painting of the bikes are:
Conclusion:
By reading today’s article, we have again concluded that anything is possible when you want to achieve that. It includes the painting of your bike all by yourself, which sounds so professional.
All you need to do is take a pre-guide on painting your motorcycle, for which we have come to you with our effort.


Leave a Reply